VESA Compatibility Explained: Mount Patterns and Adapters
VESA is the universal monitor mount standard — and the source of half the mount-compatibility confusion in home office builds.
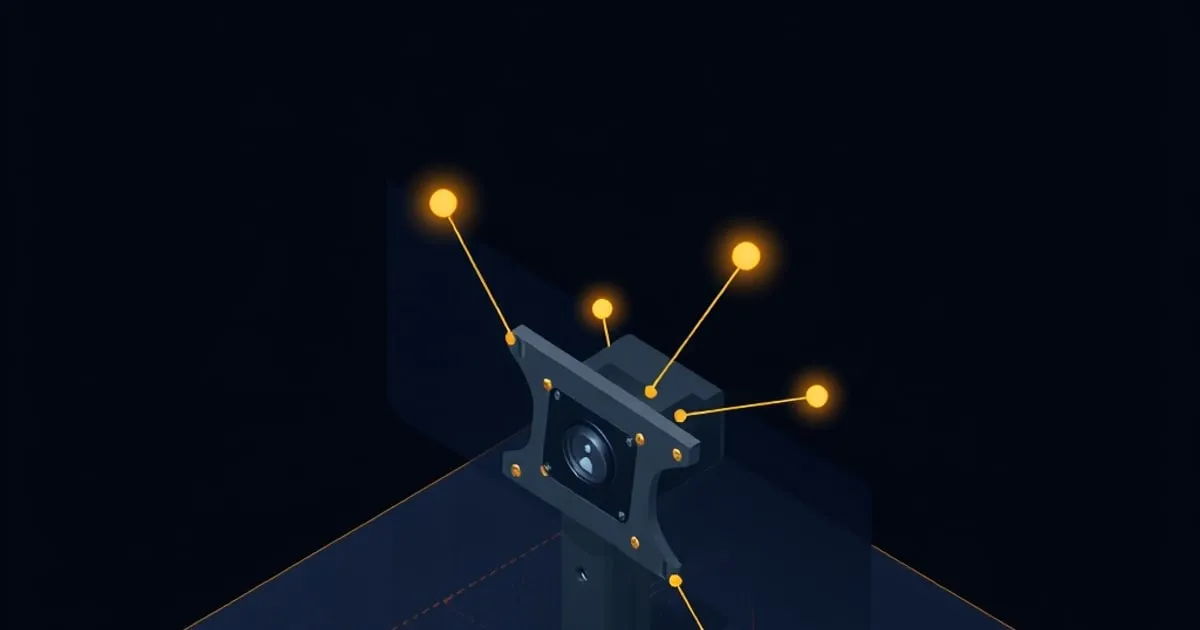
VESA — the Video Electronics Standards Association — is the body that defined the universal mount pattern used by every monitor and TV with a wall or arm mount option. The pattern is simple: four threaded holes in a square or rectangular pattern, measured in millimeters between hole centers.
In practice, “VESA” is the single biggest source of mount-compatibility confusion in home office builds. Buyers grab a monitor arm and a monitor without checking, then find the monitor is 200×100 and the arm only supports 100×100, or the monitor doesn’t have a VESA pattern at all (some Apple displays, some Samsung high-end displays), or the screws included don’t fit the monitor’s threaded inserts.
This guide explains the patterns, the adapter options, and what to verify before you buy.
The Common Patterns
VESA patterns are quoted as horizontal × vertical hole spacing in millimeters. The common ones:
- 75 × 75 mm — Smaller monitors (typically under 24”). Most budget desktop displays.
- 100 × 100 mm — The single most common pattern. 24”–32” monitors from essentially every brand.
- 200 × 100 mm — Larger 32”–43” displays and some heavy ultrawides. Less universal than 100×100.
- 200 × 200 mm — Larger displays (43”+), heavy ultrawides, some high-end commercial monitors.
- 300 × 300 mm and 400 × 400 mm — TV-class. Almost no monitor arms support these.
The pattern is measured between hole centers, not between the outer edges of the holes. If you’re checking visually, the four threaded holes will be in a regular square or rectangle on the back of the monitor.
Which Arms Support Which Patterns
The best monitor arms support multiple patterns out of the box:
- Ergotron LX ↗ (Amazon Associates): 75×75, 100×100
- Ergotron HX ↗ (Amazon Associates): 100×100, 200×100, 200×200
- Humanscale M2.1: 100×100 (need adapter for 75×75)
- Herman Miller Flo Plus: 100×100, 200×100
- Fully Jarvis Monitor Arm: 75×75, 100×100
Most heavy-duty arms (HX, MX, MX Mini) support the larger patterns. Most mid-range arms support 75×75 and 100×100.
If you have a 200×100 or 200×200 monitor and want the LX form factor, you need the HX (the LX physically cannot mount these patterns without modification).
When You Need an Adapter
There are three common adapter scenarios:
1. Pattern mismatch
The monitor is 75×75; the arm is 100×100 only. Need a VESA pattern adapter plate (~$15 on Amazon). The plate has 100×100 holes on one side and 75×75 on the other.
Buy: VESA 100 to 75 adapter plate ↗ (Amazon Associates).
2. Non-VESA monitor
Some Apple displays (older Studio Displays, all retina iMacs converted via target mode), some Samsung curved monitors (CRG-series), and some specialty displays ship without VESA holes. For these, you need a stand-replacement bracket — a clamp that attaches to the existing stand-mount footprint and provides a VESA pattern outward.
These are brand-specific. The most common:
- Samsung CJG-series VESA bracket for the CJG curved gaming monitors
- Studio Display VESA Mount Adapter (Apple direct, $79 — only works if the monitor was originally ordered with the VESA option)
- Third-party brackets for specific monitor models (variable quality)
3. Wrong screw length
Often overlooked: the screws that come with your monitor arm may not fit your monitor’s threaded inserts. Monitor inserts vary in depth, and screws that are too long bottom out before the monitor is secure; screws too short don’t grab enough thread.
Always have a small pack of M4 screws in 8mm, 10mm, 12mm, and 15mm lengths on hand. Costs $5 from Amazon and saves a return trip on installation day.
Buy: M4 screw assortment ↗ (Amazon Associates).
Heavy / Curved Monitor Caveats
For monitors over 25 lbs or with curvature deeper than 1500R:
- Use a VESA reinforcement plate between the monitor and the arm. This plate distributes load across the four mount points and prevents the threaded inserts from working loose over time.
- Verify the arm’s quoted weight capacity is at least 1.5x the monitor’s weight. The Constant Force tension in spring-loaded arms (Ergotron, Humanscale) works best in the middle 60% of the rated load range; very-near-max loads cause drift.
Specifically for curved monitors over 1000R curvature: the center-of-gravity is closer to the screen face than VESA standard assumes. This creates persistent torque on the arm pivot. Result: the arm may sag forward over weeks even though it’s within spec.
Workaround: tighten the arm tilt-tension dial to maximum, and use a reinforcement plate.
Mount Style: Clamp vs Grommet vs Wall
Beyond VESA pattern, the mount style affects which arms you can use:
Desk clamp
The most common style. A C-clamp that grips the back edge of the desktop. Pros: no drilling, easy to move. Cons: limited to desks with clear back-edge access, 1.4”–2.4” desktop thickness for most arms.
Grommet
A bolt that goes through a 3/8”–1” hole in the desktop. Permanent install. Pros: thinner profile under-desk, no clearance constraint above. Cons: requires drilling.
Most arms ship with both clamp and grommet hardware. Some premium arms (Humanscale, Herman Miller) include both as a single kit.
Wall mount
Less common for monitor arms (more common for fixed displays). The arm’s base plate bolts directly to a wall stud or anchor. Pros: removes desktop entirely from the mount path. Cons: limited reach unless using a wall-mount-specific arm (most desktop monitor arms don’t support this).
Pre-Purchase Verification Checklist
Before buying a monitor arm, verify:
- The monitor has a VESA pattern (check manufacturer spec sheet, not the marketing page)
- The pattern is supported by the arm (75×75, 100×100, or 200×200)
- The monitor weight is within the arm’s capacity (use weight without stand)
- The desktop clearance fits the clamp or grommet specification
- The monitor’s depth + arm reach fits in your space
- You have appropriate M4 screws on hand (5–15mm)
Common First-Install Problems
”The arm sags forward / can’t hold position”
Tension needs tuning. For Ergotron arms, there’s a hex-key tension adjustment on the arm joint. Tighten 1/4 turn at a time. If at max tension it still sags, the monitor is too heavy for the arm or the spring is failed (warranty replacement).
”The screws spin without tightening”
The threaded inserts in the monitor are stripped or wrong size. Try a longer screw first; if that doesn’t work, you need to send the monitor for warranty or use a third-party bracket.
”The pattern doesn’t match”
Adapter plate, see above.
”The monitor’s plastic VESA cover is in the way”
Some monitors ship with a plastic cover over the VESA holes (Samsung, some LG). Pop it off; it’s not load-bearing.
Related Reading
- Ergotron LX vs HX vs MX — which Ergotron arm to buy
- How to choose a monitor arm — full decision tree
- Sister site StandDeskReview ↗ — for the desks these arms attach to
Final Word
VESA compatibility is the single most overlooked spec when buying a monitor arm. Verify the pattern matches, the weight is within capacity, and you have appropriate screws on hand before installation day. The Monitor Arm Fit Checker flags a VESA or capacity mismatch in seconds if you enter your monitor’s specs. Adapter plates exist for almost every mismatch scenario; the only true blocker is a monitor without a VESA pattern at all.
Related

Monitor Arm Weight Ratings Explained: Reading the Spec That Matters Most
Weight capacity is the spec first-time buyers get wrong most often. Here's how to find your monitor's true weight, why the 1.

Ultrawide and Heavy Monitor Arms: What Changes Above 30 Inches
Mounting a 34-inch ultrawide or a heavy 32-inch+ display breaks the rules that work for a 24-inch monitor. Here's what changes with capacity, reach, VESA

Desk Clamp vs Grommet vs Wall Mount: Choosing How Your Arm Attaches
The three ways a monitor arm attaches to your space — C-clamp, grommet, and wall mount — compared on install effort, sturdiness, desk-thickness limits